Creating payment rules on your account comes in two steps.
First, you will need to set up the Payment Items that you want to charge your guests. These define what the guest will select during the booking process.
Second, you will create the Payment Templates that will determine when to charge for these items and what restrictions will apply.
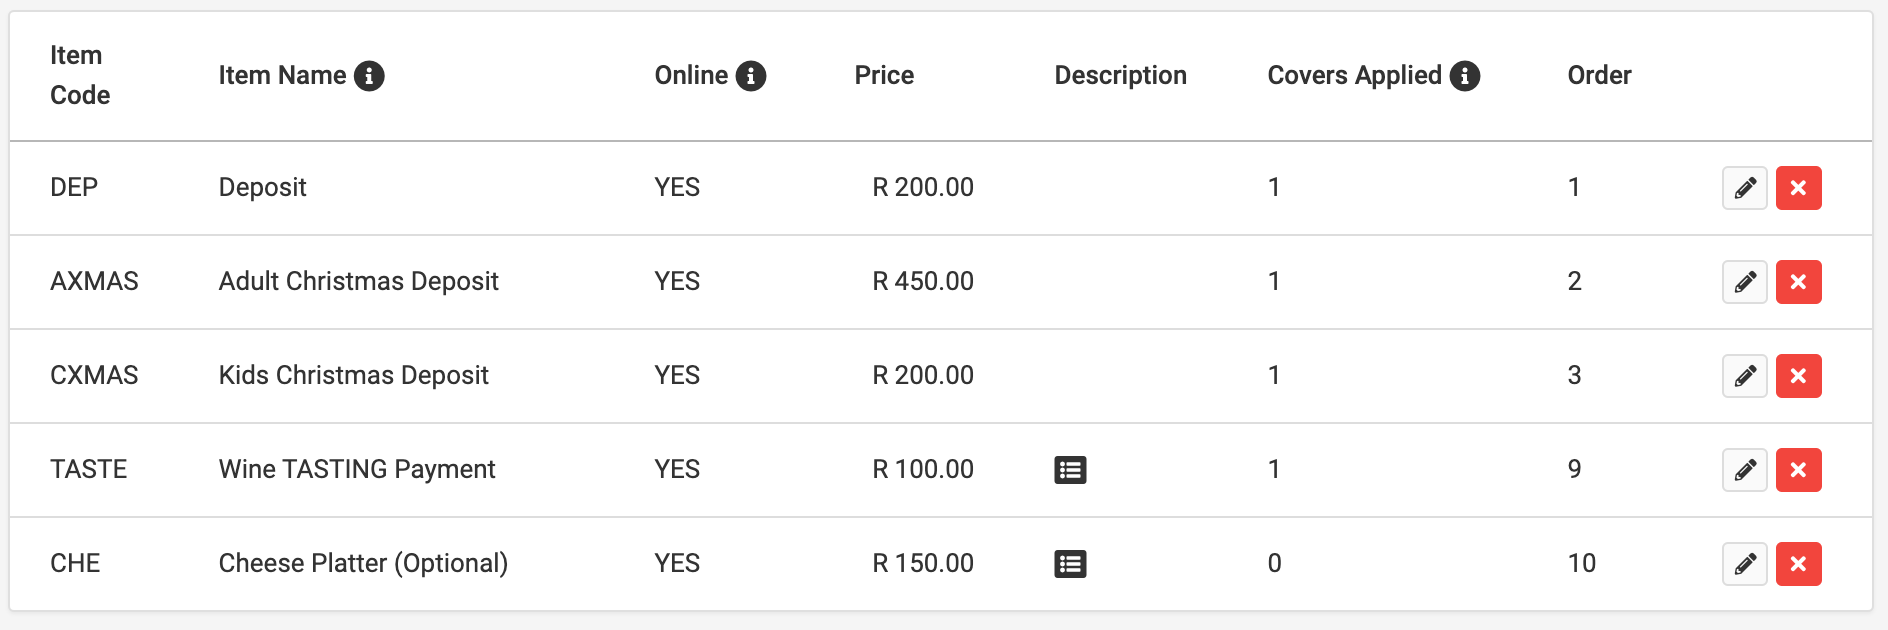
Setting up Payment Items
You will need to be logged into Dineplan with an Admin User Account.
-
Click on the "Settings" tab on the left
-
Click on the "Payment Items tab" on the bottom of the right hand submenu
-
Click the "Add New Payment Item" button at the top right

-
Fill in the following details:
-
Item Code (for internal use)
-
Item Name (this will be shown to guests)
-
Description (optional)
-
Item Price
-
Available online - you can toggle this on or off, depending on if you want it only to be used internally or if you want guests to be able to select it online.
-
Covers Applied - how many covers should this item be assigned to.
-
if set to zero, the payment item will be optional
-
if set to 1, (eg. deposit per person) and a table of four books, they will have to select the payment item four times.
-
if set to 2, (eg. picnic for two) then a booking of four will only have to select the item twice.
-
-
Order - this just sets the order in which the item will display in the list
-
-
Click "Save Payment Item"
Below are a few examples of what this might look like.
As you can see, this does not define when and how the guest should select these.
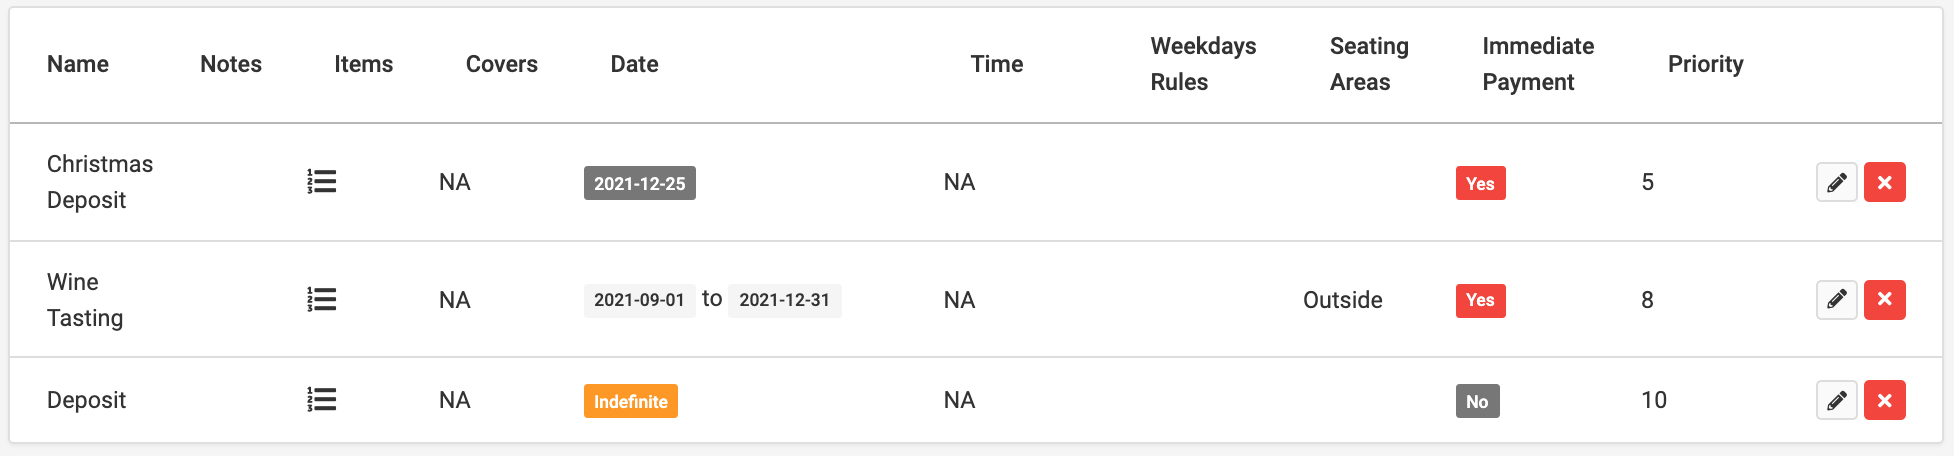
Setting up Payment Templates
Click "Add New Payment Templates" button at the top right

-
Fill in the following details:
-
Template Name - this is internal
-
Template Note - this is also internal and optional
-
Linked items - select the payment items that you set up previously from the drop down that you want to apply to this template
-
Template Priority - if there is a clash on a specific day when two or more templates could apply, then the template with the highest priority number will take precedence. 1 is the highest priority
-
-
Set the restrictions for the template - leave all the sections blank to apply to all days, covers and times
-
Cover Size - choose what booking size the template will be applied to (eg. deposits for tables of 8+ guests)
-
Date - apply to a date range, or one specific date - eg. deposits applied only in high season
-
Between times - eg. deposits only applied in the evenings
-
Weekdays - eg. deposits only applied over weekends
-
Seating Areas - eg. a specific deposit for a private area
-
Require immediate payment - if set to Yes, then guests will not be able to complete the booking process without paying the requested amount.
-
-
Click "Save Payment Items"
Below are a few examples of what this might look like.