If you're looking to send additional information or documents to your guests along with their email confirmations, adding attachments is a great option.
By attaching files to your emails templates, you can provide your guests with all the necessary details and instructions they need for their reservation. Whether it's a menu, a map of your location, or a form, attaching files to your emails can help streamline the communication process and make things more convenient for both you and your guests.
In this guide, we'll walk you through the simple steps to add attachments to your emails and ensure that your guests receive all the necessary information they need for their upcoming reservation.
To add an attachment to your Dineplan email templates, simply follow these straightforward steps.
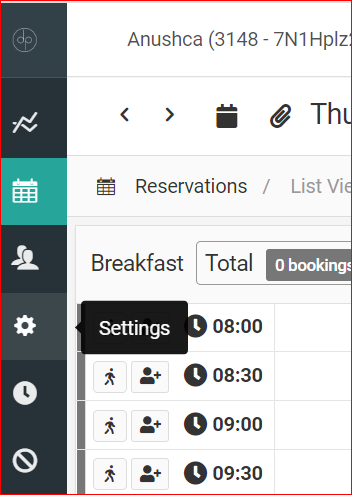
Step 1: Navigate to the settings tab located on the left-hand side of your account.
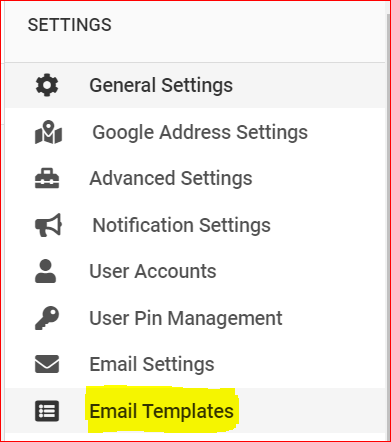
Step 2: Click on 'Email Templates' in the sub-menu.
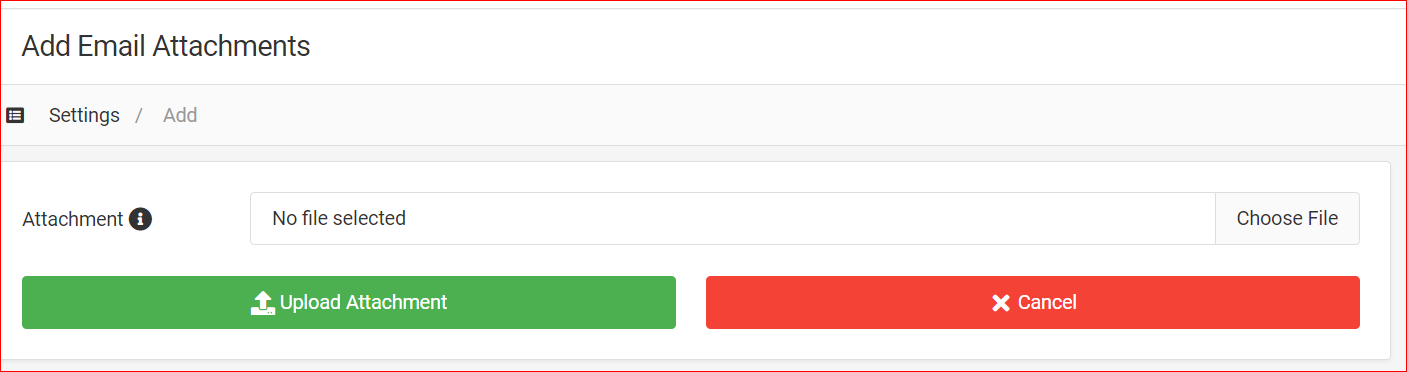
Step 3: Scroll down until you reach the 'Add Email Attachment' option.

Step 4: Select the file you wish to upload and add it to the email template.
Once the file is uploaded, it will be visible in the section as shown in the image below. In case you decide to remove the attachment in the future, it can be easily deleted from your Dineplan account.
Please note that any attachments you add to your account will remain there until you remove them, and it is your responsibility to manage and delete any that are no longer relevant.

It's important to keep in mind that when you attach a file, you would need to add it to a specific template thereafter. This means that you will need to edit either your 'new' or 'change' template to include the attachment.