IMPORTANT NOTE
A separate events account is needed to create and manage these types of events. Using a standard restaurant account for this will block off all other availability for the day.
For special dates or events hosted at your restaurant, a custom date will usually work perfectly.
If you’d like to learn more or chat about whether ticketed events would suit your needs, please feel free to contact us at support@dineplan.com
The tickets can be customized per event, allowing the restaurant to include all of the necessary details as well as add a custom picture/logo to the ticket.
Each ticket will contain a unique barcode, so that a booking for 10 covers will receive 10 unique tickets so that if all 10 guests do not arrive at exactly the same time it is easy to manage. You can use either a barcode scanner with a USB connection or the camera on your laptop to scan the tickets on arrival which will link directly to the guests booking in Dineplan to make management of your event a breeze.
There are 3 steps to creating a ticketed event in Dineplan.
-
Add the event details
-
Edit the event shift to create bookable times
-
Set up the payment items and template
1. Add the event details:
-
Log in to your Dineplan account and click on the Exceptions tab on the left
-
Click on the Ticket Events button under the Submenu on the right to open the Ticketing Events page. Here you will see a list of your current, future and past ticketing events that you have set up.
-
Click “Add event” button at the top right
-
Enter the details of the event as you want them to display on the ticket.
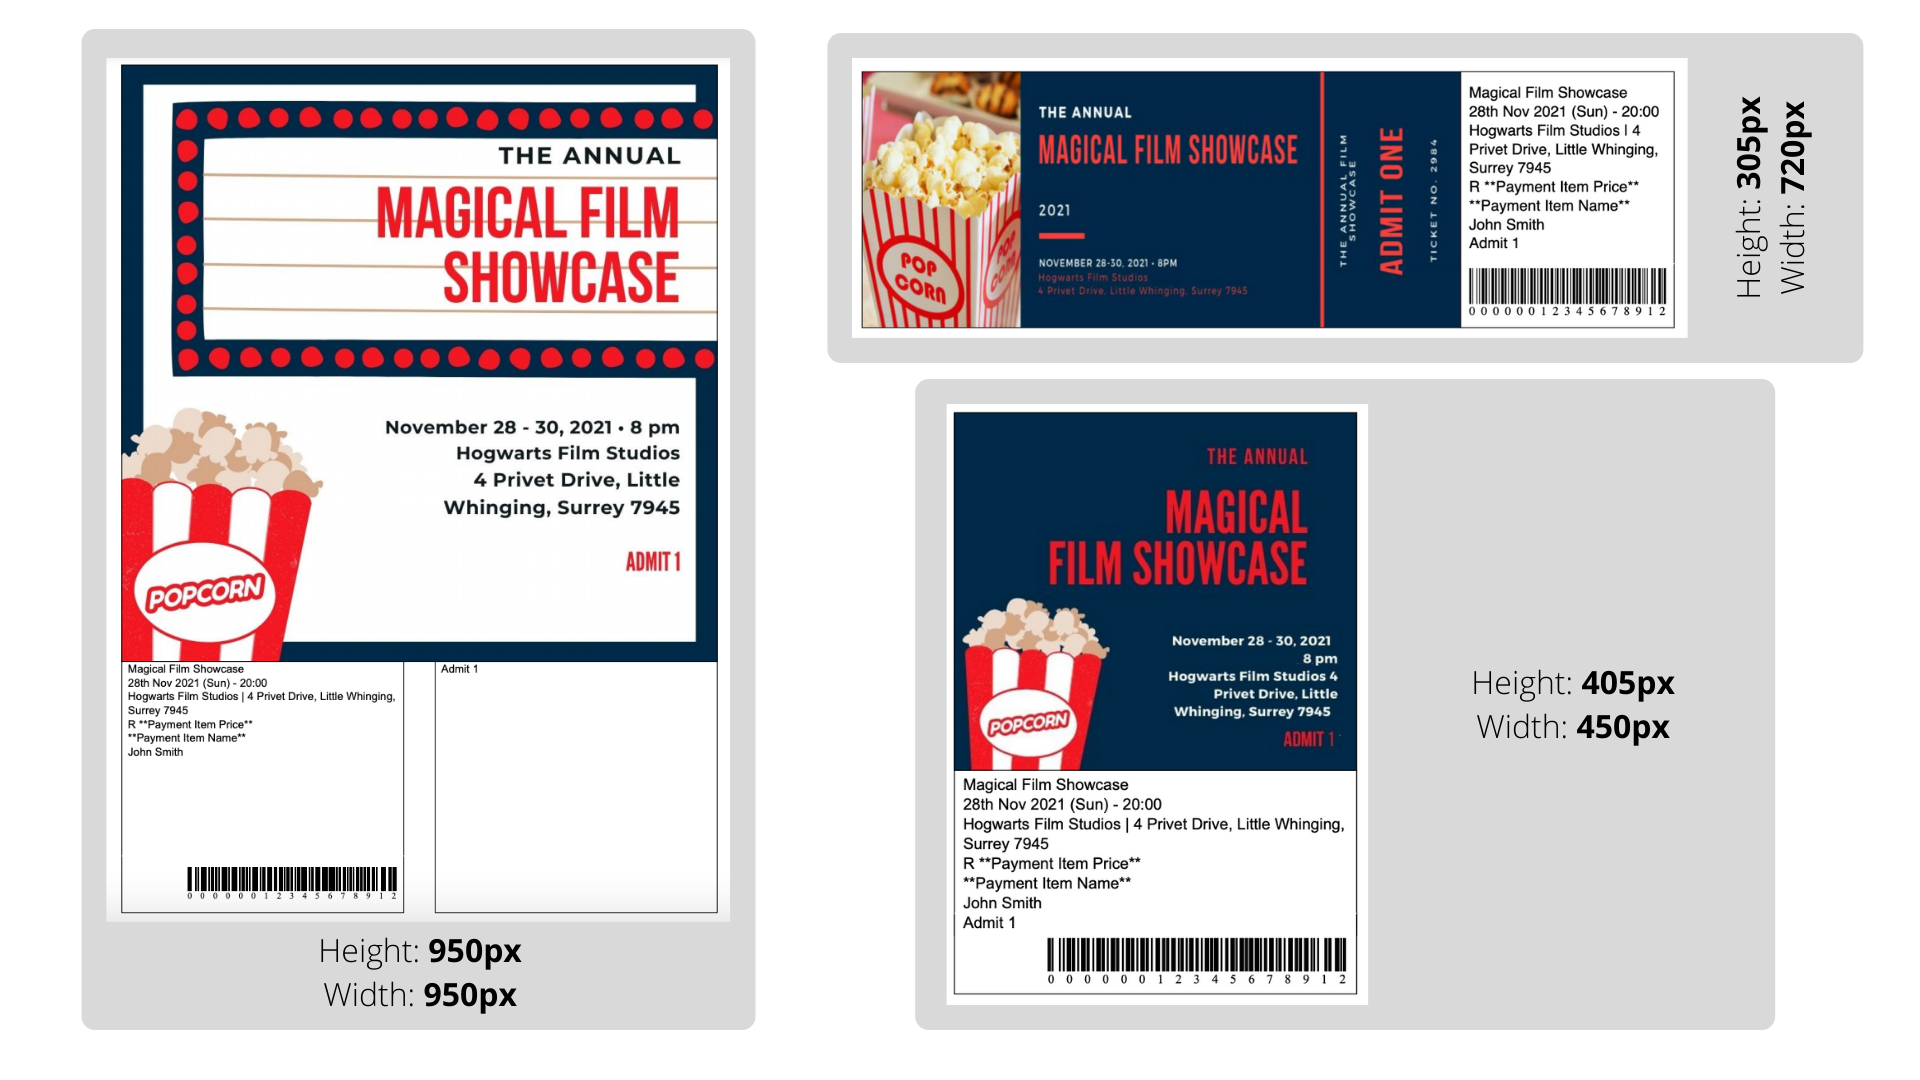
- You can select the Ticket Style of how you want the .pdf ticket to display as and select an image to be displayed on the ticket, here are the ticket styles you can choose from:
Edit the event shift to create bookable times:
-
In the Ticketing Events page, click on the edit button (grey pencil icon) on the right in line with the event that you want to edit.
-
Click on the “Add new shift” button at the bottom right
This will allow you to open up the areas that you want to make available to be booked for the event as well as set the first and last time that guests can book. (If there is one starting time, set both first and last times to the same time and guests will only be able to book for this time.)
- You can also set online availability settings such as Pacing, Limit Last Minute - Bookings and Close Shift Prior to Start. -
Click the Save Shift Settings button at the bottom once you are done.
Set up the payment items and template:
If a payment template has already been set up and applied to the date of your event, this will show at the bottom of the Edit Event page by the Applicable Payment Template section.
If there is no template or the template that is displaying is incorrect:
-
Click the “Add new payment template” button at the bottom right
-
Enter the details of the payment template, select the payment item in the Linked Items section, make sure the correct date is selected and make sure that the priority is set to the highest.
- If the payment item that you want to charge is not available, please set this up first before going through the above step
For assistance on setting up any of the above, please contact our support team on support@dineplan.com and we will gladly assist you further.
Did this answer your question?